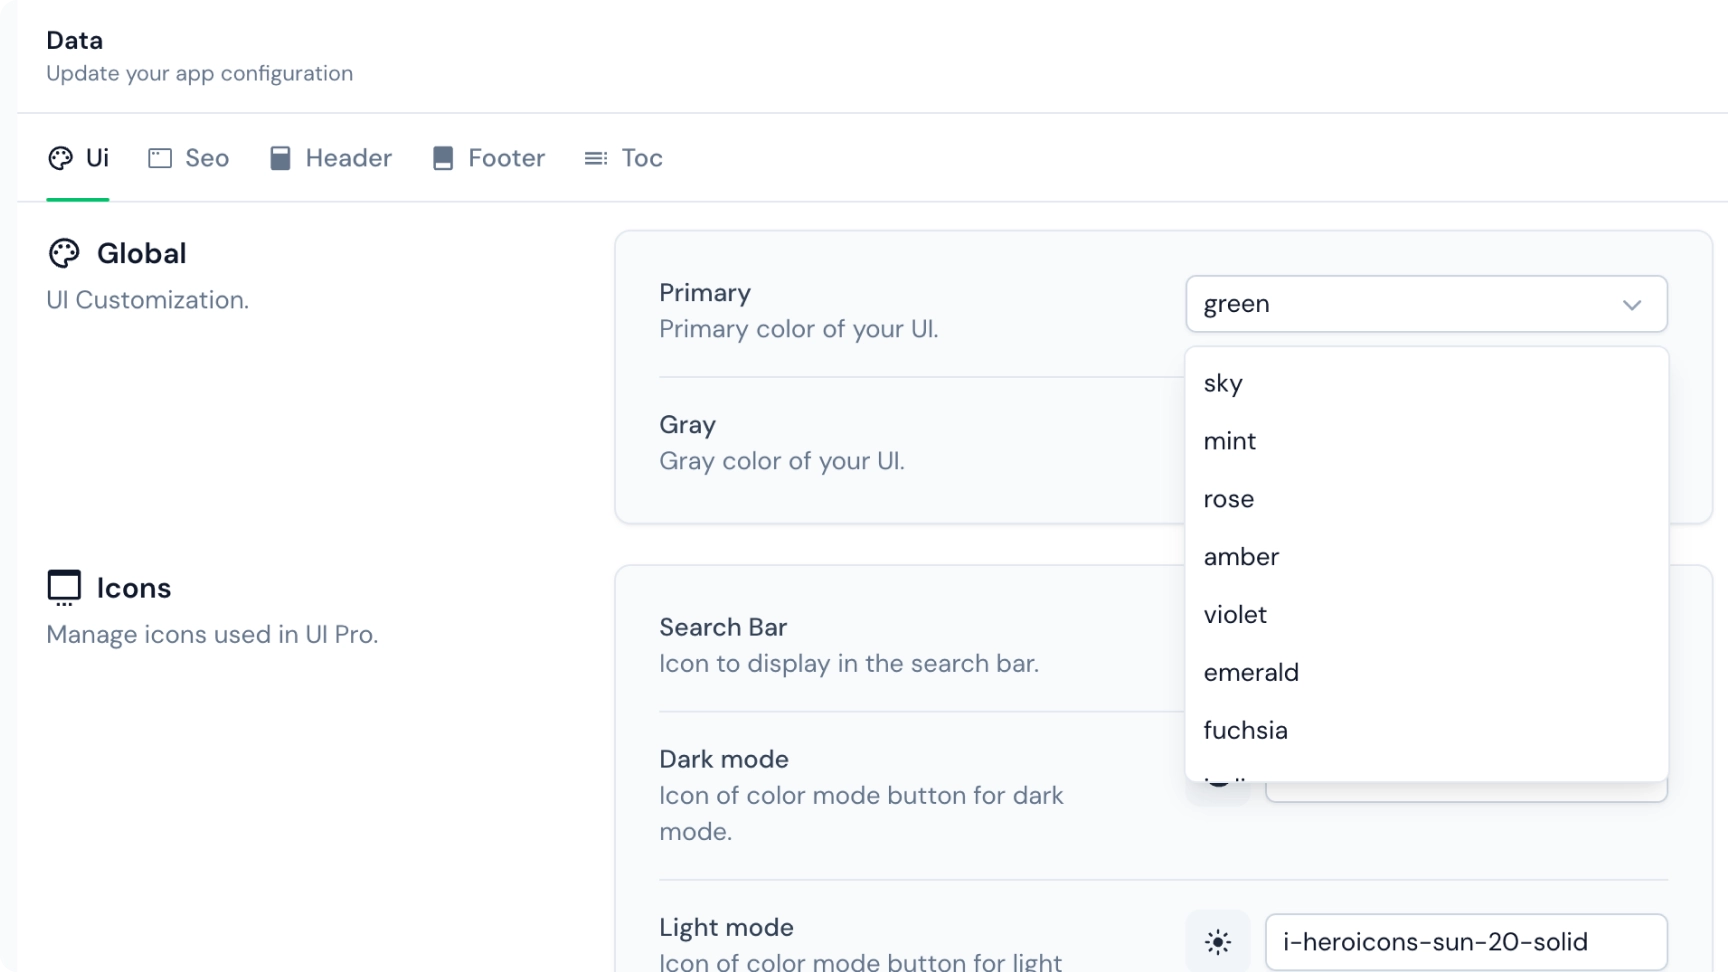
Tailor application configuration edition
When entering the Config tab of the editor, you can browse configurations to customize your website. These configurations represent the settings defined in your app.config.ts file.
app.config.ts
The app.config.ts file is a configuration file introduced in Nuxt 3. It's a TypeScript file that allows you to configure various aspects of your application settings. Developers can easily turn any website into a configurable experience using this file.
Ensure you have at least an empty file in your app:
export default defineAppConfig({})
Customize edition
To create a customized editing experience for your app.config.ts in Studio, you need to create a nuxt.schema.ts file in your project. This schema serves as a representation of your app.config.ts.
Helpers
- The
groupmethod allows you to customize parent objects. - The
fieldmethod allows you to customize inputs (aka leaf).
import { field, group } from '@nuxt/content/studio'

export default defineNuxtSchema({
  appConfig: {
    parent: group({
      title: 'Parent title',
      description: 'Parent description.',
      icon: 'i-icon-to-display',
      fields: {
        leaf: field({
          type: 'Type of component used to edit your field',
          title: 'Field title',
          description: 'Field Description',
          icon: 'i-icon-to-display',
          default: 'default value'
        })
      }
    })
  }
})
Input Types
The type in the field() method's first parameter can accept various values:
- string
- number
- boolean
- array
- object
- icon
- media
Based on these values, the Studio UI will adapt to display the appropriate input type. For instance, an icon picker is displayed for icon type or the media library is displayed for media type.
Text can be displayed as a select instead on a classical input if you provide a required key in the field() method:
import { field, group } from '@nuxt/content/studio'

export default defineNuxtSchema({
  appConfig: {
    parent: group({
      title: 'UI',
      description: 'UI configuration',
      icon: 'i-ph-palette-fill',
      fields: {
        primary: field({
          type: 'string',
          title: 'Primary',
          description: 'Primary color of your UI.',
          icon: 'i-ph-palette',
          default: 'sky',
          required: ['sky', 'mint', 'rose', 'amber']
        })
      }
    })
  }
})
Edit on Studio
Once your schema is deployed. Any user can access the Config section and play with the generated form.
Any update in the form will be directly applied to the app.config.ts file. You can review those changes on the review page.

export default defineNuxtSchema({
  ui: group({
    title: 'UI',
    description: 'UI Customization.',
    icon: 'i-mdi-palette-outline',
    fields: {
      primary: field({
        type: 'string',
        title: 'Primary',
        description: 'Primary color of your UI.',
        icon: 'i-mdi-palette-outline',
        required: ['sky', 'mint', 'rose', 'amber', 'violet', 'emerald', 'fuchsia', '...']
      }),
      gray: field({ ... }),
      icons: group({
        title: 'Icons',
        description: 'Manage icons used in UI Pro.',
        icon: 'i-mdi-application-settings-outline',
        fields: {
          search: field({ ...}),
          dark: field({ ... }),
          light: field({ ... }),
          external: field({ ...}),
          chevron: field({ ... }),
          hash: field({ ... })
        }
      })
    }
  })
})